So about 3 weeks ago I was telling Christie I was ready to continue our painting project from last winter. Last year we painted our bedroom and family room. Now I'm ready to continue that paint. She suggested that before I get too excited about painting walls, we were going to need to do something about our light fixtures. Spending money to replace light fixtures just wasn't going to happen. I can be cheap but Christie can be a first class tight-wad. It's really one of her endearing qualities. Neither of us wanted to spend money on new lights. So she showed a DIY blog post about painting brass light fixtures. We had a couple of spares from when we built the house so we really didn't have anything to lose.
I setup a make shift paint both in the basement to try and keep things mostly contained. So here is what we had. Mostly brass domes (8) and one hanging light. Once I got started I realized I was likely also doing the kitchen ceiling fan because you can't find light kits that support four - 60W bulbs anymore and we wanted the bright light in the kitchen. Because I'm a total "right brain" man - I really don't care but I guess they were getting pretty dated - but they still worked.


So the magic in a can is this. We did buy some sanding sponges and scuff them up pretty good to give the paint some bite but generally the paint worked great.

So the process wasn't without incident. During all this we were also trying out some new light bulbs. With the new LED bulbs we wanted to at least give them a try. When we found a 40W replacement that was too bright for our hallway we thought we would put it over our kitchen sink, in the newly painted fixture.
The dome had glued/painted itself to the fixture. The paint is dry in 60 minutes but needs several days to "cure" which I figured it could do just fine while mounted to the ceiling. I had to 2 hand the dome and it broke while I removed it. Most the glass fell into the dome. So we had to buy a $15 fixture just for the glass.


So here are some of the shots of the tear down and prep for paint. The hanging paint booth was a happy accident after a Costco trip (free box). Worked well for the hanging arms and the chain pulls for the ceiling fan.


The ceiling fan had to come completely apart to spray the blade arms and protect the motor from getting paint in it. It was only about 1,000 screws to paint as well. There is still 2 little spots that need touch up after the re-install from the ceiling cover knocking into the hanging rod. I plan to spray the leftover paint into a paper cup and dab the touch up with a tiny brush.
On the day I re-installed the ceiling fan I noticed the lower motor cover had this tiny edge that wasn't painted. I had already re-glued the felt covering back in place. You can see that in the picture below. This edge was going to be showing. Now it was only a couple paper thicknesses worth of brass that would be showing; so some quality control with a black sharpie and you can't even tell.

Here is how the ceiling fan came out once it was finished. Pretty good for a $6 can of paint on a fixture we bought in 1998. We are still searching for a great LED bulb for the fan. The ones we have tried all have a dark spot on them that is pretty annoying if the bulb is visible. Not a big deal in our other fixtures.
***If you want the PG-13 description of the bulb please call Christie.***

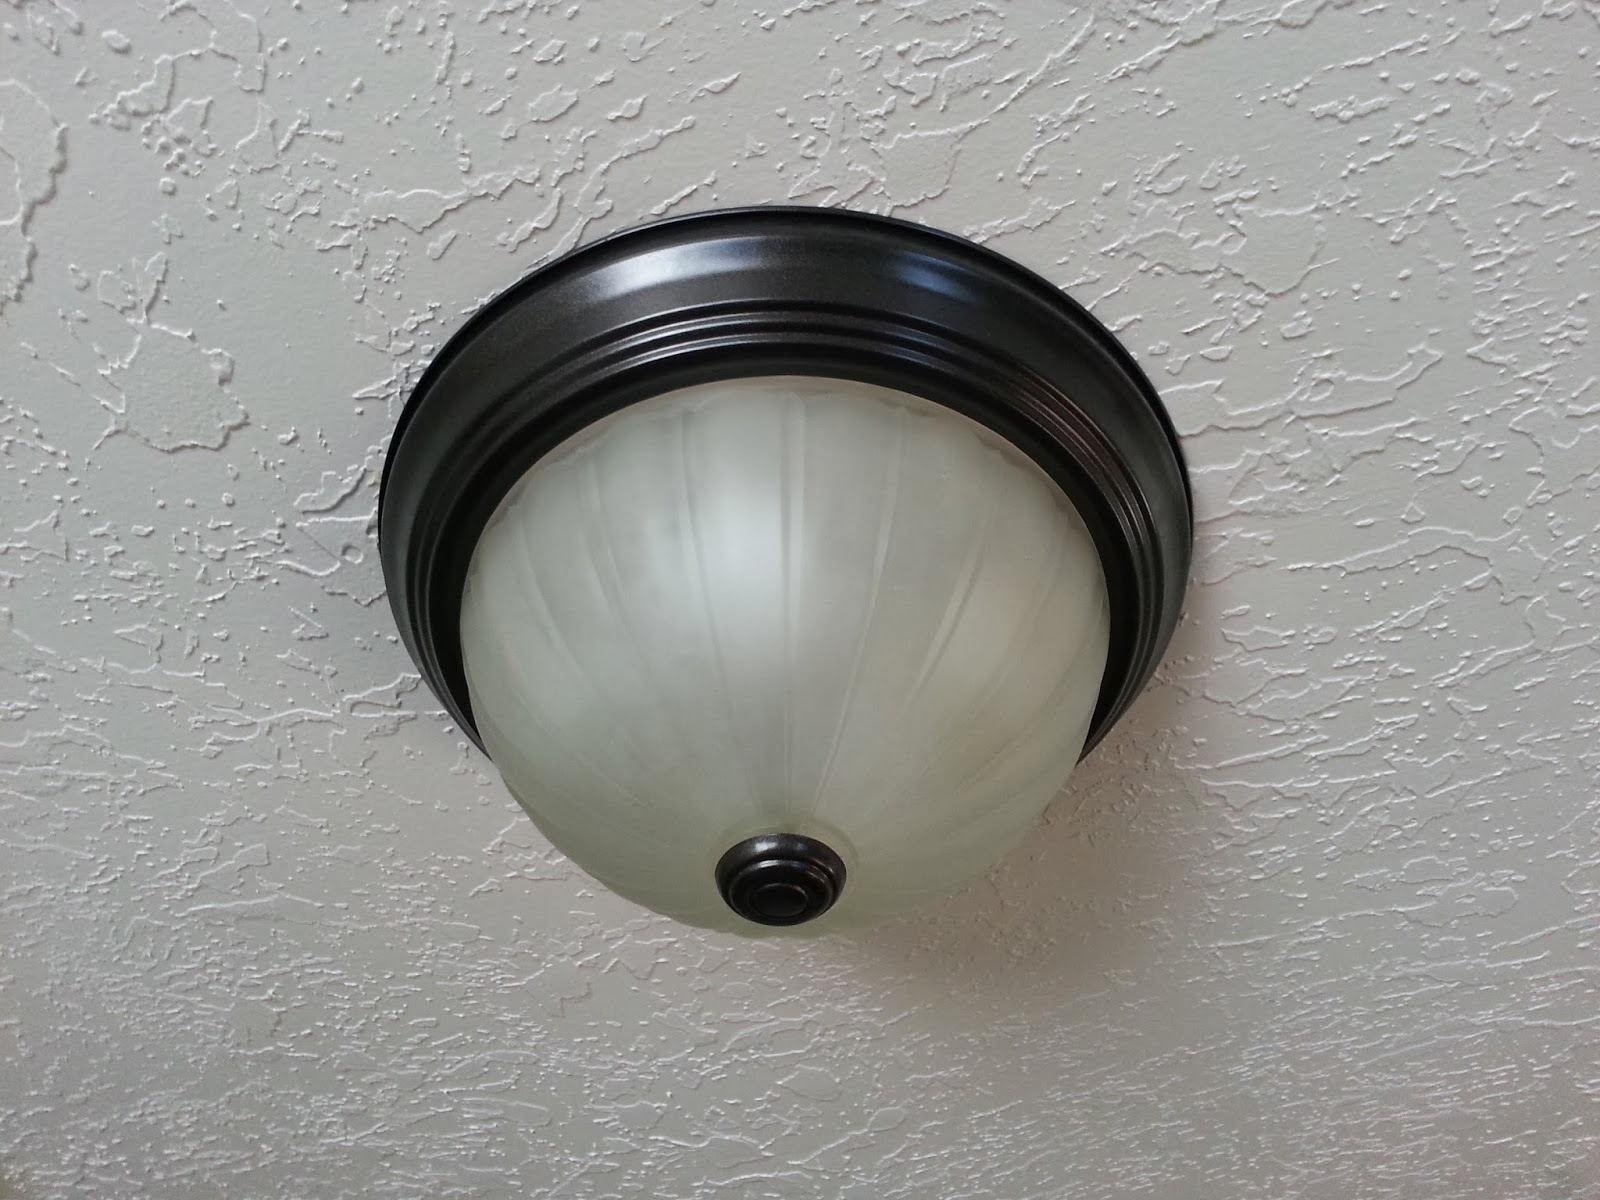
The other fixtures came out just as good too. One thing I noticed is that our electrician from 1998 didn't bother to connect the ground from ANY of the lights. I fixed that when I re-installed. Probably doesn't matter much but it made me feel better. Also the lazy electricians couldn't be bothered to install the locking nuts on the threaded tube that extends to down through the glass dome for the medallion that holds the glass up. So over the years we have had a couple of them come unscrewed while trying to replace dead bulbs. I had planned to buy some Locktite for the threads. It wasn't until I pulled out the 2 unopened spares that I realized there were locking washers and just how lazy they had been. So I bought a couple spare parts from Lowes and all are now locked in place and I'm happy about that.
Here is the finished look of the lights now. We are still thinking about replacing the hanging light with something else but for now this will work. The glass was previously clear but Christie etched the inside to give it a look more like the other lights.

Now time to paint some walls!! I've was also informed that the kitchen cabinets and door knobs are next. Can't wait for spring.
Rough Totals.
4 cans of spray paint = $25 - your mileage will vary
2 sanding sponges = $4
Frog Tape = free, I already had it. About $8/roll but worth the extra money. So good.
2 spare parts kits = $4-ish
Glass dome replacement = $15
Glass etching liquid = $8
Locktite spray glue = $7 - this was for foil underlayments inside the lights and the felt covering in the fan